Friday 29 April 2016

Two Paper Divas~ Happy Trails to you...

Happy Friday Crafty Friends, I'm back to share with you an lil' make I made for
http://www.twopaperdivas.com/shop/


using the newly released Howdy. I love this set for masculine cards and the DT gals have made some ADORABLE makes using it for Girly cards too, so be sure to check out the blog here to see them all!

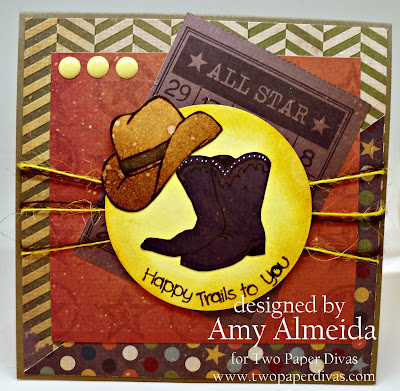
I used DP from Recollections and paper-pieced the Cowboy boots and fussy cut them out. Added a little White Gelly roll pen for some added "pop"...that's man code for "Bling". hehehe. I adhered it to a circle die cut that I used Squeezed Lemonade and Mustard Seed Distress Inks on so they boots would stand out. For the Cowboy hat, I stamped the image with Walnut Stain Distress Ink onto watercolor paper I applied Vintage Photo Distress Ink onto and spritzed with water to get a weathered and worn look. I watercolored the band of the hat with some more Walnut Stain. I love Two Paper Diva stamps because you can bend and manipulate the stamps to curve like I did to apply the sentiment onto the circle. ;o)


Some twine, enamel dots and a Bingo Card from my stash finished off the card to keep to the masculine feel of the card. 

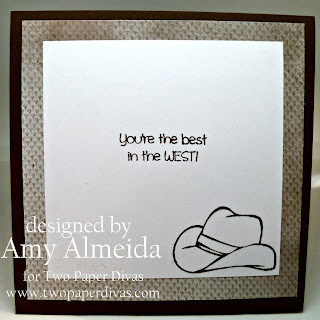
and here's the inside of my card using the same design as the front:

Because I was having so much fun with this set and already had my Distress Inks, I made another card to share with you...I know, I know...awesome right? LOL


Using Vintage Photo, Tea Dye, Squeezed Lemonade and Walnut Stain Distress Inks on Watercolor paper with the Ranger Mini Blending Tool, I created the base of my card and added some water droplets for added texture. Then I used an old Stampin' Up spot Stamp in Walnut Stain to create some added texture to my base. Stamped the cool "Howdy" sentiment and cowboy boots onto my card as I think it makes another fun Masculine card that could be used for any occasion. 

and here's the inside using the Cowboy Hat and another fun sentiment from the set:

Please stop by next Friday for another fun Make using this month's New releases...it's "DREAMY" ;o)
 
Don't forget to check out Two Paper Divas on the blog, FB, Instagram and Pinterest for more product information, DT Inspiration and New Releases.


Monday 25 April 2016

a2z Scrapbooking Supplies~ Sew Stylish!

Hi crafty friends, I'm here with a little vintage make I made for
https://a2zscrapbookingblog.com/


using digital images from  Hero Arts Make Your Own DK016 
and Hero Arts Sew Crafty DK027. I wanted to show you how to dress up your digital Images with a little distressing and some embellies from your stash. 
 
I used  images from the Hero Arts Make Your Own DK016 and Hero Arts Sew Crafty DK027 Digital sets. These sets are both jam packed with crafty goodness! So much to use and work with. 

I printed the Stylish Ladies from the Hero Arts Make Your Own DK016  set in Sepia onto white cardstock and trimmed around the image and distressed the edges using the Tim Holtz Paper Distressing Tool and then inking the edges with Vintage Photo Distress Ink. I adhered this to a piece of scrap from my stash that looked like fabric to me and distress the edges of that too. Both pieces were mounted onto Kraft cardstock cut to 4.24x5.5' and made into a top fold card. 


I then used a Chipboard Dressform I had in my stash and covered it in Gesso and then brushed on some "Scarab Beetle" Twinkling H20's which lends a vintage feel and color to it. Some Ivory Mesh and Rose Ribbon and gold pearls from my stash finish it off.

Next I printed the a sentiment to tie my theme all together from the Hero Arts Make Your Own DK016 set and mounted inked the edges with the Vintage Photo Distress Ink. I printed and cut out a spool of thread from the Hero Arts Sew Crafty DK027 set which I colored in with my Spectrum Noir Markers.

There you have it, a shabby chic card made using Hero Arts Digital Images, a little distressing and some embellies from your stash!

You can get a full supply list by checking out the a2z Scrapbooking Blog here

If you are in need of any crafty items from the a2z Scrapbooking store, feel free to use promo code Amy15 at the checkout to obtain 15% off any purchase of $25 or more (excluding shipping)

Also, there is still time to play along in our WATERCOLOR challenge!

Happy Craftin’!


Friday 22 April 2016

Faery Ink~ Desting of Oz- Dorothy

Good Morning Crafty Friends, if your looking for my Two Paper Divas Post, please go here I'm here to share a card I created for

using the newly released Destiny Oz- Dorothy.I loved Wizard of Oz so was very excited to get to work with Dorothy. :o)
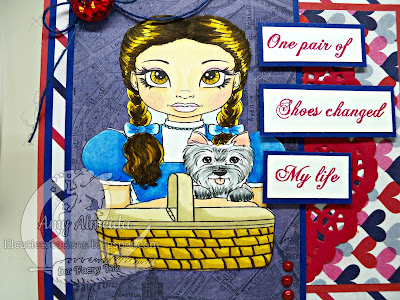
 I started with some Red and Navy Cardstock and DP in the same color range. Added a red Doily from Recollections and sentiment from Great Impressions- Changed My Life D441 stamped with Blazing Red StazOn Ink which I cut and mounted on Navy Cardstock . Finished with some Red Liquid Pearls and Bling button and Twine. 
I colored the image with Spectrum Noir Markers and fussy cut her out:
and here's the inside of my card because what is Dorothy without her Ruby Slippers???:
  
Thank you for stopping by, and I hope I've inspired you today to get crafty! Don't forget we also have a fun "FLOWER POWER" challenge over on FB- Come play along with us! 


Happy Craftin'!
~Hugs~
 

Two Paper Divas~ Rose Bouquet

Happy Friday Crafty Friends, I'm back to share with you an lil' make I made for
http://www.twopaperdivas.com/shop/

Today I have a card using the newly released 
and the "Spotlight" technique. Love this technique with the soft color palette of the card- allows the "POP" of color to really stand out.:o)


 I used some DP and Pink Cardstock from my stash and created a border with Martha Stewarts- Vintage Floral Punch with some Silver Recollections Glitter Tape. Added a Heart Doily and a Lil' Clothesepin that I added some pink twine to finish it all off. 

I colored the "Spotlight" piece that I die cut with a heart die and highlighted the image with Spectrum Noir Markers


I added a sentiment from Sweet Sentiments set in Blazing Red StazOn. Used a Tag die from Nellie Snellen's Curved Tags set.
Mounted it onto the card with 3D Foam Tape.  
 Thank you for stopping by today, I sure hope I've inspired you to get Crafty today!

Be sure to join me next Friday for a couple of fun Masculine makes using another set from this month's New Releases.


Oh and we have a new Challenge going on!! It's a fun Photo-Inspired challenge:
  You can use the colors, the images, both, whatever you are inspired to use when you look at this photo.
 Come play along with us for your chance to win a $20 GC from Two Paper Divas!
 
Don't forget to check out Two Paper Divas on the blog, FB, Instagram and Pinterest for more product information, DT Inspiration and New Releases.


Wednesday 20 April 2016

Faery Ink~ Watercoloring with Tottie Breezy Fae!

Good Morning Crafty Friends, I'm here to share a card I created for

using the newly released Tottie Breezy Fae. How cute is she??? 
I wanted to practice my watercoloring using my Aquarelle Watercolor Pencils.


I printed her onto some Strathmore Watercolor 9x12 sheets and colored her with the Aquarell Watercolor Pencils and Tim Holtz Water Brush and fussy cut her out and mounted her with 3D Foam Dots. I used DP from stash and a  Hero Arts "Hope Your Day Shines" (Retired) sentiment in Blazing Red Staz On ink. Finished with some buttons and twine.


Here's a closer look at the image- I learned to let your image DRY after printing before watercoloring...but all in all not too bad. :o)

I hope I've inspired you today to get crafty and try some watercoloring! Don't forget we also have a fun "FLOWER POWER" challenge over on FB- Come play along with us! 


Happy Craftin'!
~Hugs~


Friday 15 April 2016

Two Paper Divas~Dream Big!

Happy Friday Crafty Friends, I'm back to share with you an lil' make I made for
http://www.twopaperdivas.com/shop/

Today I have a card using the newly released 
Dream Big and Rose Bouquet sets. I just love how simple, yet empowering this sentiment is!


I started with a 5.25'x5.25' piece of Watercolor paper and embossed the Rose Bouquet with White Embossing Powder. Then I went over it with Poppy Red Twinkling H20's and spritzed with water til I had the desired effect I wanted. 


I embossed the  Dream Big sentiment with Black and Red Embossing powders and then layered it onto a Spellbinders Lacy Circles die cut on metallic black CS with some 3D Foam Pads. Added some Black Silk Ribbon and bling button from my stash to tie it all together..no pun intended. lol!


Be sure to join me next Friday for another fun make using this month's New Releases.


Oh and we have a new Challenge going on!! It's a fun Photo-Inspired challenge:
  You can use the colors, the images, both, whatever you are inspired to use when you look at this photo.
 Come play along with us for your chance to win a $20 GC from Two Paper Divas!
 
Don't forget to check out Two Paper Divas on the blog, FB, Instagram and Pinterest for more product information, DT Inspiration and New Releases.