Showing posts with label Journal Page. Show all posts

Monday, 20 November 2017

STAMPlorations~ Smooshing with Watercolors Journal Page


Good afternoon everyone, I have a new tutorial up at the STAMPlorations blog today, for a fun art journal page using the Smooshing Technique and watercolors!


You can view the step-by-step Tutorial here

Here's my Art Journal page using Kuretake Gansai Tambi Watercolors with the Smooshing Technique:


I hope I've inspired you to give the smooshing Technique a try!


Sunday, 22 October 2017

Sparkle in the Rain

Happy Sunday y'all! I'm here to share with you my latest art journal page using the SPARKLE IN THE RAIN silhouette stamp from

Here's my journal page:

I started by adhering different sized paper pieces from Carte Bella with Matte Medium. Once dry I added some Golden Crackle paste and Prima Rock Glitter to random areas. 


I then applied layers of Liquitex Paints in greys, white and black in a circular motion onto my page with  a brush and my fingers :o). I added some text to the background with a Text stamp in Jet Black Archival Ink

I stamped the image from Sparkle in the Rain set onto cardstock and fussy cut her out. I then painted her in Red Liquitex paint. Once dry, I adhered her to my layout with Matte Medium. I finished with some Tim Holtz Chat stickers. 
 Kinda looks like James Bond  doesn't it? LOL!

Hope you are having a wonderful weekend and thank you for stopping by!


Wednesday, 24 May 2017

LBBS~ Peony Art Journal Page

Hello, crafty friends, today I have a fun Art Journal Page using one of the amazing Mixed Media Images that Olga has in the Little Blue Button Shop! I used the Mix Media Peony digi stamp
Isn't she gorgeous??? 
Be sure to check out the other amazing Mixed Media Images in the shop here
I started with a Bo Bunny Chipboard Mini Album page and applied Distress Paints in Spun Sugar, Barn Door and Antique Linen. I stamped some text in the background and applied texture paste thru a Memory Box Stencil.  I used a Penny Black Stamp to ground my image. 

I printed off 4 copies of the digital Image and colored the flower, bird and flower in her hair several times with Spectrum Noir Markes. I then layered the pieces to give it more dimension and adhered the pieces with foam dots/tape. A little glossy accents, Spectrum Noir Sparkle Pen and Heart Bling finish off the page.


I find adding a little dimension with layers to a Digital Image can enhance your projects to suit your needs. 

I sure hope I've inspired you today. 

Happy craftin'!


~hugs~


Sunday, 7 May 2017

STAMPlorations~ May Mixed Media Challenge

Happy Sunday everyone, it's that time again for a new challenge over at
http://stamplorations.blogspot.com/2017/03/stencil-sunday-march-5.html

The theme is always anything mixed media goes, except a card! Just remember you must use at least one stencil (any brand) in your project. You have until the end of the month to play!   


 This month, I a fun and bright chipboard journal Page using a couple of the NEW ARTplorations Stencils,  Super Bubbles Stencil and Floral Flutes Stencil
I started with a Chipboard Journal Page from Recollections and added some Distress Paints for my base layer in Fossilized Amber and Carved Pumpkin. I then added black Gesso thru the Floral Flutes Stencil. Once Dry, I traced circles form the Super Bubbles Stencil with White and Black Posca Pens. I added some white details and finished with some Stickers from my stash for the sentiment. And voila,  a quick and easy, fun and bright Journal Page. :o)


 I sure hope I've inspired you to get crafty and join in our challenge. 


Saturday, 1 April 2017

LBBS~ April New Release~Fishing Sophie

Good morning crafty friends, today I'm super excited to share with you my first make for 
http://lbbstamps.com/

Here's my make using Fishing Sophie which is one of two adorable new releases this month. 

I did a journal page using Fishing Sophie:

 I started by creating my nature scene using Distress Paints and applying it to my page with a brayer. I applied white acrylic paint thru a stencil for my "clouds" and stamped some circles in my water for added texture. I created my border with Acrylic Paints and stamped my sentiment using Staz On inks. 


I colored the image with SN Markers and fussy cut her out and applied her to the corner as if she's fishing in this vast lake and is just enjoying the gifts of Nature ;o)


I hope I've inspired you to get crafty today. 


Saturday, 11 February 2017

STAMPlorations~ Cupcake Inspirations

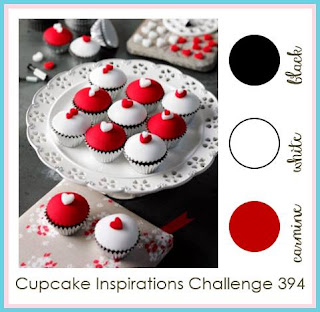
Hello crafty friends, today I have a fun journal page to share with you for the Cupcake Inspirations Challenge  that STAMPlorations is sponsoring.

It's a color/ theme inspiration photo challenge...and MMmmmm Cupcakes...who doesn't love a delicious cupcake???  

Each challenge, they provide a cupcake to inspire you to create a card  or other craft project following the suggested theme or colors.  Here is this week's cupcake photo inspiration ;o)

http://cupcakeinspirations.blogspot.ca/

I used the color combination and cupcake theme for my art journal page using  STAMPlorations Two Cupcakes Digital Stamp and  ARTplorations Bubble Dance stencil
I started with Brusho's in Scarlet, Brilliant Red and Black and applied it to my pages with Art Basics Soft Matte Gel Medium. Love this technique, as it gives such vibrant results without losing the color from adding water. Plus is seals your page at the same time. :o) Then I added white acrylic paint thru the ARTplorations Bubble Dance stencil randomly thru the background to tie in the white from the inspiration photo and to create some background texture. I then added white and black paint splatters. I printed the STAMPlorations Two Cupcakes Digital Stamp onto Design papers and onto Kraft Cardstock for the base layer (to get the cake color) in the regular size and then enlarged it to get the larger cupcake image. I fussy cut out all the pieces and then paper pieced them together and colored them the cupcake tops with Spectrum Noir Markers. I painted a black border to frame my pages and then added some white with my Uni PoscaWhite Pen.  I then adhered the cupcakes to my page and sealed them with Soft Matte Gel Medium and once dry added some highlights with Distress Crayons and Faber Castell Pitt Pens. I doodled onto the stenciled bubbles with black Fine Pitt Pen to break it up a bit and added some white gel pen highlights to the cupcakes. I finished by stamping my sentiment using different pieces of several sentiments I had onto the same text paper I used for the cupcake tops. Added a little Red Barn Distress Ink and then doodled a frame around them with the Black Fine Pitt Pen. 

I felt the cupcakes needed some more texture so I added Christmas Red Stickles, White and Black Nuvo Drops and Glossy Accents with silver and black micro beads. 


I sure hope I've inspired you to join in the fun Cupcake Inspiration Challenge and see you again soon. 


Sunday, 29 January 2017

Coffee...Good til the last drop!

Happy Sunday y'all, today, I'm here to share with you a lil' Journal Page I did that was inspired by 
Vicky Papaioannou's "Take Life One Cup At A Time" Journal Page here.   I love Vicky's style and her YT videos are a lot of fun to watch. Be sure to check her out!

so here's my page:

 I started by layering pieces of CS that I cut into squares/rectangles of different sizes and adhering them to my journal using Golden Matte Medium. Once dry, I applied, Fossilized Amber, Carved Pumpkin and Barn Door Distress Paints and blending with a semi wet baby wipe. I then added Ranger Texture Paste thru the TCW "Sketch Grid" Stencil. Once dry, I stamped Prima "Messy" Stamp in StazOn Midi "Claret" and a hexagon stamp (sorry I got it in a swap, so don't know the brand) in Sepia Archival Ink

 I then cut out my teacups from the Silhouette Store 4 tea cup silhouettes by Samantha Walker and the Coffee Sentiment from Coffee Cup by Tanya Batrak. I used BasicGrey's "Curio" paper pad.   I then inked the edges with Vintage Photo Distress Ink and embossed the "Coffee" Sentiment with clear embossing powder, to get the "liquid" feel of coffee. I then adhered them with Art Basics Soft Matte Gel. I created a shadow around the cups with Vintage Photo Distress Crayon and finished with highlighting from my White Molotow Pen

I stamped the sentiment with Jet Black Archival Ink using Tim Holtz Worn Text and added some white highlights with the Molotow pen. I finished with a stamped border from an old Stampin' Up set using StazOn Olive Green Ink and some white acrylic paint splatters. 

Thank you for stoppin' by, I sure hope I've inspired you to grab a cuppa and craft! ;o)


Monday, 23 January 2017

Bloobel Progressive Challenge #1~ I must Protest!

Good evening crafty friends, I'm here today with a journal page I created using the "I must Protest" Digi from
https://www.bloobel.com/blogs/news/bloobel-progressive-challenge-january-2017
As soon as I saw the image we got to play with this month, I had an idea of having jumbled letters flowing out behind her. So she needs to SPEAK UP to get her words out to be heard. At least that's what I was trying to convey. ;o) LOL!


I created the background by layering old book paper and Tim Holtz Melange Tissue Paper. I then did a Gesso wash. Once it was dry, I used Acrylic paint in Azur Blue and Crimson mixed with Golden Glazing Medium. I blotted off some of the color with a baby wipe. I like the texture this "new to me" technique gave and will definitely using glazing medium again. ;o) I stenciled Dylusions Staggered Brickwork stencil in behind to create a "Wall" in Grey Acrylic Paint and highlighted a few with my White Uni-Posca Pen and then stamped Stampin' Up "Wordsearch" in Blue Hawaii StazOn Midi. I cut out some Upper and Lower case letters using my Curio and then colored some with Distress Paints and adhered them using Gel Medium. I then added some splatters with Dylusions Ink Sprays (White Linen, Crushed Grape and Cherry Pie) for more added texture and color.

I printed this little protester onto watercolor paper and heat set it then used Distress Markers and Waterbrush pen to watercolor. I added some white highlights with my White Uni-Posca Pen and used Ranger's Glossy Accents on her eyes as I wanted them to be bulging from her yelling...which is why I made her a little "Red in the face"...It's hard work yelling  don't ya know? hehehe I finished with some black shading on the  right side of her using a Watercolor pencil and watercolor brush.

I stamped my sentiments with Tim Holtz Mini Worn Text, Just Cre8 Scratched TailGB  and small text letters from Michael's onto tissue paper and used Gel Medium to adhere them down.


Thank you for stoppin' by tonight and  hope I've inspired you to be creative today. :o)


Friday, 4 November 2016

Joggles~ Sticky Snippets Pocket Page

Good morning crafty friends! I'm back to share with you a Journal Pocket Page I made for 

The pockets I created can hold 3 small tag and 2 #8 tags. :o)


Joggles Sticky Snippets are the perfect mixed media blank canvas, accepting many types of media including paints, ink sprays, glimmer sprays, acrylic inks, glitter paste, and even light coats of gels and mediums. I had a lot of fun creating this Pocket Page journal layout and hope you enjoy it too.
 
If you'd like to see my step-by-step tutorial and more close-up photos, please check out the Joggles blog here


Thanks for stopping' by, I sure hope I've inspired you to get crafty today. 


Monday, 22 August 2016

Faery Ink~ Never Let Fear...

Good Morning Crafty Friends, I'm here to share a Journal Page I created for

using the newly released Calavera Rosa. I think this stamp is GORGEOUS and I couldn't wait to use it. :o)

 I started with twinkling H20's onto Watercolor paper. I then used Black gesso over Joggles Star Flowers Stencil. I left the center clear it just framed the image. :o)

I colored the image with Spectrum Noir Markers  keeping with the Pink and Black color palette  and used Spectrum Noir Clear Sparkle Pen on the Black around the eyes and nose. I then fussy cut her out:
A self-created sentiment finished off the journal page. :o)


I sure hope I've inspired you to get crafty today! 


Don't forget to stop by our FB Page for giveaways, crafty chats, swaps and to share your makes-
We love seeing what you create with Faery Ink Images.
Oh and did you know Faery Ink is on Instagram and Pinterest?
Share your makes and visit us for more inspiration!


Happy Craftin'!
~hugs~


Friday, 6 May 2016

Joggles ~ Bloom Journal Page

Good Morning, Crafty Friends! 
I'm super excited to share my first make as a DT member for
https://www.joggles.com/


Today I have a journal page using a few of Joggles fabulous new foam stamps. They are delightful to play with and give a great crisp impression every time! Not to mention they are so easy to clean up afterwards. The minute I saw the Wonky Layered CirclesSmall, Wonky Layered Ovals Small and Teardrops In The Round Joggles Foam Stamps, I knew that I wanted to turn them into flowers. 


Here's my tutorial on using these fun stamps and vibrant colors on a journal page.
Start by blending Dylusions Paints in Grape Crush and Lemon Zest onto the Large Dylusions Creative Journal page using the Mini Ink Blending Tool. Quick Tip: I find by drying in between layers/colors- either by air-drying or using a heat tool- you get a smoother transition into blending the colors.

Use your fingers to finishing blending the Dylusions paints once you have the color base down that your happy with.

Using the Mini Ink Blending tool, apply the Cherry Pie Dylusions Paint onto the Teardrops In The Round Joggles Foam Stamp and stamp onto a spare sheet from the Journal Page. Fussy cut around it leaving a slight border and set this aside. The great thing with Dylusions Paints, is they dry quickly.

I love using stencils for added texture in the background of my journal pages. Using the Mini Blending Tool, apply the Honey Gold Tim Holtz Mini Distress Ink through the Dina Wakely "Essentials" Stencil in random spots around the journal page. Be sure to let this dry before going to the next step or your ink may smear.

Again, using the Mini Blending Tool, apply the Crushed Grape and Squeezed Orange Dylusions Paints onto the Wonky Layered Circles Small Joggles Foam Stamp and stamp towards the bottom have of the journal page- I stamped it twice. Quick Tip: I use different Ranger Inkssentials Mini Ink Blending Replacement Foams for each paint color along with several of the Mini Ink Blending Tools so you are not constantly switching the foam pads and there is no cross contamination in your paint containers.

Now, apply Postbox Red Dylusions Paint onto the Wonky Layered Ovals Small Joggles Foam Stamp and stamp it twice onto the journal page- just a little lower than where the Wonky Layered Circles was stamped in the previous step.

Grab the cutout of the Teardrops In The Round Joggles Foam Stamp that we cutout in step 3 and glue it onto the center of your journal page using Golden Matte Medium. I placed mine higher than the previous stamps used, as it is larger and I wanted that to be my focal point.

Using the Deep Purple Archival Ink with the Wonky Striped Border Joggles Foam Stamp, stamp a border all along the edges of your journal page. Again, let this dry to prevent smearing.

Now to turn our stamped shapes into flowers! Using a pencil, sketch in some stems for the “flowers” then color the stems in using the Chrome Green PITT Brush Pen.

I decided my background needed a little more texture. So using the Bubbles Joggles Foam Stamp and Magenta Hue Archival Ink, stamp only a portion of the Bubbles image onto random spots of your page, by curling the foam stamp when pressing down for the impression. These foam stamps are very flexible and are great for stamping only a portion of the image.

Using the Leaf Green Archival Ink and Dotted Leaf Small Joggles Foam Stamp, stamp leaves onto the stem of the Teardrops In The Round “flower”.

Use the Uni Ball Signo White Pen to highlight/doodle on your “flowers”.

To lend a more whimsical feel to my page, I did a Bokeh Effect Technique using a homemade stencil- which is a piece of acetate with different sized die cut circles- but any stencil with different sized shapes on it will work. Using a make-up foam pad and the Frost White ColorBox Cat Eyes Ink, ink your circles thru the stencil onto your page and layer throughout without re-inking your foam pad. This gives the effect of the bubbles being close-up or further in the distance.

Once the bubbles are dry, highlight them with Gelatos, by blending only a side of the bubble. I used Coconut, Snow Cone, Gold and Watermelon Gelatos.

Use the watercolor pencils in Purple and Grey to highlight the bubbles that overlap each other, by blending the lines with your finger. This gives the overlapping bubbles dimension.


Color portions of the Wonky Striped Border with the Faber Castell Stamper's Big White Pen, to add some more color contrast and dimension to your border.
Print the computer generated word “Bloom” onto some white printer paper and trim around the word with a Mini Paper Trimmer. Then mat it onto black cardstock with the Zig 2 Way glue. Quick Tip: By matting your phrases/sentiments onto some black cardstock, it allows the word to stand out against our vibrant and busy background.

The final step to the journal page is adding some Golden Matte Medium in the center of the Teardrops In The Round “flower” and sprinkling with the Recollections Glass Beads. This just gives some fun and pretty dimension to your focal “flower”.

And we are done. :o)

Here's the supplies I used:

Dylusions Paint by Dyan Reaveley: Crushed Grape, Lemon Zest, Squeezed Orange, Postbox Red and Cherry Pie
Archival Ink Pads: Deep Purple, Leaf Green and Magenta Hue
ColorBox Cat Eyes- Frost White
Faber Castell PITT Pens: [F] Fine Tip – Black and Chrome Green Opaque
Faber Castell Stamper's Big White Pen
Faber Castell Gelato's: Coconut, Snow Cone, Gold and Watermelon
Karat Aquarell 125 Professional Watercolour Pencils: Grey and Purple
Recollections Glass Beads
Golden Matte Medium
Zig 2 Way Glue Pen
Black Cardstock
Scissors
Paper Trimmer

I sure hope I've inspired you to not be afraid to use color and some fun ways to use these fun Joggles Foam Stamps in your art projects. 

Don't forget to show us your journal pages at the Joggles Art Adventure FB Group; we'd love to see what you make. 

I'd like to enter the following challenges:

http://stamplorations.blogspot.ca/search/label/mixed%20media%20challenge

Creative Artiste Challenge #14- ATG 

Rhedd's Creative Spirit May Challenge 

More Mixed Media Challenge- Pink 

Craft Stamper- ATG with Stamping