Wednesday, 30 March 2016

a2z Scrapbooking Supplies~ What's the word, Bird?

Good morning crafty Friends!

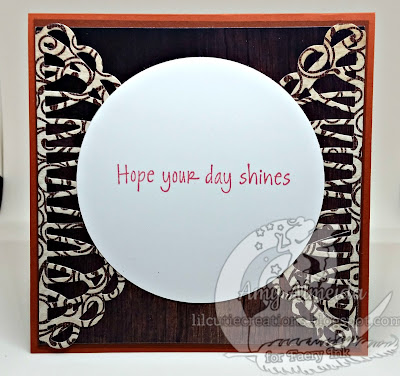
I'm here with a lil' card using some Mixed Media Techniques and the  versatile Hero Arts Color Layering Bird and Branch set and matching Hero Arts Color Layering Bird Frame Cuts
for
http://a2zscrapbookingblog.com/

 
To see more pictures and how I made my card, please check out the a2z Scrapbooking Supplies blog here.


 SUPPLIES
3D Foam Tape
White Enamel Dots

If you are in need of any crafty items from the a2z Scrapbooking store, feel free to use promo code Amy15 at the checkout to obtain 15% off any purchase of $25 or more (excluding shipping)

Don't forget to enter this month's challenge: EMBOSSING

Wait, there's more...a2z Scrapbooking is also on Twitter, Instagram and Facebook. Follow us on these social media sites so you don't miss out on any future promotions, Challenges and inspiration!

Happy Craftin'!


Friday, 25 March 2016

Woooohooo! Joggles DT!!

Ok, I have some AMAZING news to share with y'all!

As you know I've been having a lot of fun playing with the Mixed-Media side of crafting and I still can't believe it....but I'm now on the Joggles Design Team!!

https://www.joggles.com/

Have you seen the vast assortment of Mixed Media, Stamping and Art Journaling supplies that the lovely Barbara, Owner of Joggles carries? Go on...check em out! You know you wanna! LOL!

Also, check out the amazing Joggles 2016 Art Journnal Adventure Group  on FB! So many talented and supportive gals there!

Be sure to check out the blog in Mid- April for the first DT Posts...and come back here May 6th  for my very first Joggles post!

Happy Craftin' friends!

~hugs~
Amy

TPD ~ Happiness is...

Happy Friday Crafty Friends, I'm back to share with you a JAVA-LICIOUS card I made for
http://www.twopaperdivas.com/shop/

and the 
http://coffeelovingcardmakers.com/2016/03/spring-coffee-lovers-blog-hop-2/
 Here's my card using the adorable mug from "Birthday Calories" Digital Set and Coffee & Friends. Nothing like a great cuppa and girl chat!! :o)
 I used some CS from American Crafts in soft Pastel Colors and some DP from my stash. The sentiment was cut out with the rectangle from "Stitched Imprint Dies" by Amy Tangerine. I finished with a cute Flower button and twine from Michael's to add some more spring Flair. 
I printed the cup and colored it with SN Markers and added some Glossy Accents for dimension. 
  
I fussy cut the mug out and adhered it with 3D foam tape.
  
I'd like to enter this into the Spring Coffee Lovers Blog Hop
Don't forget Two Paper Divas has a new Challenge! Come play along here! It's a Fun TIC-TAC-TOE Challenge and there's a $20 GC up for grabs to a luck winner!  

Be sure to check out Two Paper Divas on the blog, FB, Instagram and Pinterest for more product information, DT Inspiration and New Releases.


Friday, 18 March 2016

DCS~ Challenge #1 Midway Inspiration

Good Morning crafty friends!
 I'm uber excited to be sharing with you my first make for
http://blog.dreamtimecraftsupplies.com.au/

Our very first challenge  has started, and you have until March 31st (Midnight Australia Time) to join in and play along! Check out the Challenge rules here

http://blog.dreamtimecraftsupplies.com.au/2016/03/dreamtime-craft-supplies-inspirational.html


Today, I have a Journal Page to share with you using Santoro London Mirabelle- The Secret stamp. 
I started by putting down some tissue paper with Matte Medium. I love the texture this technique gives to the page. Then I used some Distress Inks to add some color to the background and sealed it with Distress Micro Glaze- AMAZING STUFF!! I stamped some text for some added texture with Distress Ink and the used some Texture Paste with a TCW "Well Rounded" Stencil for added dimension. 

I colored the image with Spectrum Noir Markers, fussy cut her out and adhered her with Zig Zag Glue onto a Tag I made with scrap pieces of  Design Paper I had in my stash. Added a sentiment from Tim Holtz's POSSIBILITIES stamp Set. Finished with some netted Ribbon, Satin Ribbon, Button and Embellishments from my stash. 

I had a lot of fun with this page as I like the softness of the image with the vintage, shabby feel of the page. 

I do hope I've inspired you to come play along with us this challenge

Wait!! There DCS is also having a DT Call!! If you enjoy crafting and interacting with fun, crafty girls, you should apply! :o)

Supply List:


TPD~A Little Sparkle, a lot of Shine

Happy Friday Crafty Friends, I'm back to share with you an lil' make I made for
http://www.twopaperdivas.com/shop/

Today I have a tag for you using the newly released "You've Got Style"and a sentiment from "Yes to Sprinkles"

 I started by applying some Distress Inks in Abandoned Coral and Squeezed Lemonade onto some Mixed Media CS that I cut into a Tag shape. I spritzed it with water droplets and heat set to ensure it was dry. I then went over random parts of it with Seedless Preserves Distress Ink and a Heidi Swapp "Squared Lattice" Stencil. I then edged with "Black Soot" Distress Ink. 
I sealed it all with Distress Micro Glaze

I then Stamped the "A Little Sparkle, a lot of Shine" Sentiment from the  "Yes to Sprinkles" Set and one of the FABULOUS Heels from the "You've Got Style" set with Jet Black Archival Ink. Finshed with some Icicle Stickles. Because you can never have too much Sparkle in your life! ;o)
 Finished with some Crinkle Ribbon and Brad from my stash.

If you love Shoes and a bit of bling, you NEED these sets! The possibilities are endless with these two sets! Check out the blog here and here, to see what the other fab DT Gals have done with these new sets! :o)

Oh and don't forget Two Paper Divas has a new Challenge! Come play along here! It's a Fun TIC-TAC-TOE Challenge and there's a $20 GC up for grabs to a luck winner!  

  Don't forget to check out Two Paper Divas on the blog, FB, Instagram and Pinterest for more product information, DT Inspiration and New Releases.


Wednesday, 16 March 2016

Faery Ink~ Zoe Zombie

Hi Crafty Friends, I'm back to share with you a lil' something different. 

http://faeryink.com


Amanda, the owner/creator of Faery Ink, has done a Coloring Tutorial!!

Go and grab yours here and play along with us!

I'm not a colorist...at all. But this tutorial was really easy to follow and more importantly, FUN!!


 I used Distress Inks in Shaded Lilac, Seedless Preserves and Concord Grape for the background. Then used Dylusions Heart (Small) Stencils with Black Soot and TCW Mini Cubist Stencil with Victorian Velvet. I then cut the BG with Lawn Fawn Stitched Hillside Borders for some dimension.  Finished with Silver enamel dots and a sentiment from Hero Arts- Year Round Sentiments.

You'll need to purchase the tutorial to get the SN Marker colors I used- as Amanda gives your variations for Copis, SN Markers and Promarkers!

And here's the inside:

Thanks for stoppin' by! Happy Craftin'!

Hugs!

Tuesday, 15 March 2016

Faery Ink~ Destiny Woodlands Fae

Good Morning Crafty Friends, I'm here to share a card I made for
http://faeryink.com/

 using the Newly  Released "Destiny Woodlands Fae" Digital stamp. 
I think the thing I love most about Amanda's images, besides them being stunning, is that they can work for just about any occasion or medium. The detail on "Destiny Woodlands Fae"   just brings out the magical essence of this fae from the lush leaves on her outfit to the strong branches on her delicate wings. Just magical and whimsical! Love, love, LOVE!!

I colored her up with rich fall-like color tones with Spectrum Noir Markers 
and added some Liquid Pearls in Red, Brown and Bisque for some added texture.  Finished with some Spectrum Noir Sparkle Pens on her wings. Just love this stuff....it's A-MAZ-ING!!
Here's the inside of my card with a Hero Arts Sentiment:

I hope I've inspired you to get crafty today.
Don't forget to stop by our FB Page for giveaways, crafty chats, swaps and to share your makes- We love seeing what you create with Faery Ink Images. 

Oh and did you know Faery Ink is on Instagram? Share your makes and visit us for more inspiration!
Happy Crafting!

Sunday, 13 March 2016

Two Paper Divas~ Challenge #2

Hi Crafty friends, it's time for a new challenge over at

http://www.twopaperdivas.com/shop/

For this challenge we have a TIC-TAC-TOE for you. 

You can choose a line up, down or diagonal!  
Just make sure all three items appear on your card.  

Here's my card using Be the Reason

I did Row 2 Across: DIE, STAMPS and BUTTONS 
 
Using Die-namics Blueprints 3 Die from MFT with Candied Apple Red and Chipped Sapphire Distress Ink around the edges to tie in the red and Navy-I stamped Be the Reason with Black Archival Ink. Distress Micro Glaze Seals the distress ink.

Some Twine and a Button from my stash finish it off and is adhered to the base card with Pop Dots. 


and Here's the inside of my card:

This Tic-Tac-Toe Challenge is going to be so fun and open to interpretations. Can't wait to see yours! So come play along!


Friday, 11 March 2016

Two Paper Divas~ Spring Blog Hop!


Welcome to the Two Paper Divas Spring Blog Hop! 
  
If you've come from Lindsay's Blog, you are on the right track. Be sure to check out and comment on all the amazing projects by the Two Paper Divas Design Team members, you have until March 13th-There are two $20 GC to the Two Paper Divas Shop!!


 Here's a book treat box I made using Wishing You a Happy Easter
I started with 2 pieces of water color paper measuring 4x6 and 2 pieces at 5x6. The watercolor paper is just sturdier and takes the inked edges well. :o) 
Score the long sides on all four papers every 1/2 inch. 
Accordion fold all the scored lines and ink the edges. I used Vintage Photo Distress Ink for a soft, vintage look. 
Weave the frame together by sliding the folds into each other and glue the ends-use clips to hold it together while the glue dries. 

For the cover, I used water color paper again measuring 9 1/2 x 5 1/4 and score at 4 1/4 and
 5 1/4.  Inked the edges again with Vintage Photo Distress Ink  and cut my DP and Cardstock for the panels 1/8th smaller. 
Using 2 Layered tag by Lizzie Mayne for my base, I then inked  Wishing You a Happy Easter Sentiment in Memento Bahama Blue.
Finished with Flowers, Ribbon and Lace from stash. 
  
Of course, the treat box needed some treats!!
I used the same DP from the outside cover  and added 4 Floral Easter Eggs by Sophie Gallo die cuts using my Curio.  

And here's the back cover
Thank you for stopping by today, and now head on over to Heather's Blog to see her fabulous Spring Blog Hop make! :o)

Here's the full blog hop list in case you get lost along the way. ;o)