Showing posts with label Seashell. Show all posts

Thursday, 19 November 2015

Julia Spiri~ Sea & Hair

Happy Thursday Crafty Friends! 

Today, I'm here to share for
http://juliaspirichallengeblog.blogspot.ca/
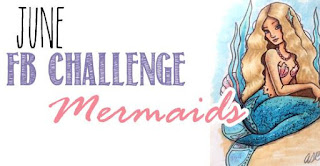
Julia is sponsoring a challenge over at
http://giveacrafteracookie.blogspot.ca/

To play along...

~Use the picture as inspiration! (the theme, the color combos, the patterns...)
~You can create ANYTHING your heart desires, as long as it's clear how you were inspired by the cookies!

Today, I did up a panel using Sea and Hair. 

I started by painting an ocean/beach scene using acrylic paints onto mixed media paper. I then laid out my die cuts: The Sun and Lighthouse are from a monthly La La Land Craft Kit , Small Seashells  from Impression Obsession , Delicate Chain from Memory Box,  & Anchor from Echo Park. I finished with a Stamped sentiment using Letter Blocks from Studio G and using my Faber Castell Black Pitt Pens. I matted it onto black CS from Recollections. 

I colored the image with SN Markers and White Signo Gelly Pen.  I fussy cut her out and adhered her with 3D Pop dots for dimension.

 I sure hope you join the challenge over at If You Give a Crafter a Cookie Challenge #32. 

Happy Craftin'!
~hugs~
Amy 

Monday, 3 August 2015

So Suzy Stamps~ Shaker Turtle

Good Morning my crafty friends,I'm here, with some inspiration for


http://www.sosuzystamps.com/

Today, I have a cute lil' Shaker Card I made using Marco-Sea Turtle. As soon as I saw this lil' guy, I knew I wanted to make him into a shaker card!


My Kraft cardbase is 5'x5' and I cut a Yellow piece of Cardstock 1/8' smaller and and a white piece 1/8' smaller again. Embossed the white CS with Embossalicious- Petite Dot EF for some texture. Used my Lifestyle Crafts Nesting Circles  for my Cut out. Cut my acetate 1/2' larger than my cutout. 
 
Now here's the fun part...you add Foam tape around your cutout and fill 'er up with sequins and adhere to the Yellow CS. I used a mixture of Green's and Yellows from The Ton- Sequins. You really need to check out all of their colors! One word....GORGEOUS!!
Finished with a Seashell Border die and a Provo-Craft "Hello Friend" Sentiment die.
 
Here's Marco, colored with SN Markers and fussy cut:


Here's the inside with Birthday Wishes Sentiment:


Thanks for stopping by and don't forget about our  "Under the Sea" challenge. If you don't have a blog - you can still enter over at our Facebook group


For more inspiration why not check out So Suzy Stamps on Twitter, Instagram, Facebook , Flickr
and Pinterest


Happy Craftin'!
~hugs~
Amy


Saturday, 1 August 2015

Salty Hugs?

Good morning crafty Friends, it's time for a new challenge over at 
http://www.sosuzystampsblog.com/2015/08/august-2015-challenge-under-sea.html


This month's Challenge is 

UNDER THE SEA


I made a lil' scene card using Polo- Seahorse and he's a lil' cutie!


I used Lawn Fawn Stitched Hillside Borders to create the waves and sand. Added some Mini Shells from Impression Obsession
 and a sprig from Anja's Leaves- Marianne Creatables.
Some Flowersoft- Sand added some texture to the card.   To finish off the card, I added Miss You Sentiment and Bubbles which I added some Glossy Accents to.  

Colored Polo with SN Markers

Layered him on with some 3D Foam Tape

Here's the inside of my card

Be sure to check out my teamies AMAZING "Under The Sea" Makes...they are FIN-TASTIC! lol


Don't forget today there is FREE SHIPPING- INCLUDING INTERNATIONAL at  
so get a shoppin'! :o)

Happy Craftin' and Shoppin'!
~hugs~
Amy

Monday, 1 June 2015

Fairy Ink FB Challenge- Mermaids

Good Morning Crafty Friends!

I'm here with a new card for a new Faery Ink
for our new 
https://www.facebook.com/groups/1454789934792148/
For this challenge I used Mermaid on the Rocks

I made a candle using this pretty Digital Stamp and a lot of shells from the beach near my house. 

I used Blue Peacock Skittles from So Suzy Stamps to look like Beach Glass and shells from the beach. Got some white netted Ribbon from my stash, as I thought it looked like the shells were caught in it. 


Here's a close up of the image, which I colored with SN Markers:
Finished with some Peacock Green Liquid Pearls for her necklace and Bracelet. 

  1. I taped tissue paper onto Cardstock- ensure to tape the tissue to the BACK of the card stock so it's folded over the edges. This ensures its stays tight and will run thru the printer smoothly. 
  2. I printed the image and colored it with SN Markers while it's still ATTACHED to the cardstock. This ensures that you don't tear the tissue as you color it. Just be careful and use flicking or subtle motions...I went over colors with the violet and teal by layering the colors versus trying to blend it on the tissue paper. 
  3. Once it's colored, I cut around the image and placed it on the candle where I wanted it. Wrapped it with wax paper and heated with my embossing gun. Just be sure to heat evenly by sweeping back and forth versus heating the same spot as you want to heat enough to stick the wax from the wax paper onto the tissue paper but not melt the candle underneath. You'll know it's attached to the candle,  as your image will come thru the wax paper clearer. ;o)
  4. That's it- Easy Peasy- and now you decorate and embellish as desired.

Hope you enter our fun challenge this month!

Be Sure to check out the Blog for all the New Releases this month. They are AMAZING! 

Also, if your on Instagram, showcase your Crafty Makes at #Faeryink!

Happy Craftin'!
~hugs~

Monday, 27 April 2015

MWLW New Release: Mermaids at Sea!

Good Morning Crafty Friends!

I'm here to share a candle I made for 
http://mywhimsicallittleworld.blogspot.ca/


This week's New Digital Release is all about the Mermaids!:Friendship, All is Calm and Love

I used Love this week- Just love the mermaids, they are all unique and so GORGEOUS!

I started with aqua ribbon around the base of the candle and then used some Shells I found at the ocean by my house (cleaned of course...lol); the tiny ones are from Michael's. Used aqua Skittles as I thought it looked like beach glass. The netted ribbon is from Walmart...as soon as I saw it, I was like "Ooooooo that looks like netting!" so I twisted it up and around the candle and attached seashells and skittles to look like it was caught in the netting. 

Here's a close-up of my colored image with SN Markers:

Here's a side view of the netting with it's catch of the day! And yes, I have burnt fingertips from attaching those lil' guys with a glue gun! Note to self: Find tweezers that will hold awkward shells before going near a HOT glue gun again...LOL!:

and here's the back of the candle:


How did I do this you ask? 
  1. I taped tissue paper onto Cardstock- ensure to tape the tissue to the BACK of the card stock so it's folded over the edges. This ensures its stays tight and will run thru the printer smoothly. 
  2. I printed the image and colored it with SN Markers while it's still ATTACHED to the cardstock. This ensures that you don't tear the tissue as you color it. Just be careful and use flicking or subtle motions...I went over colors with the violet and teal by layering the colors versus trying to blend it on the tissue paper. 
  3. Once it's colored, I cut around the image and placed it on the candle where I wanted it. Wrapped it with wax paper and heated with my embossing gun. Just be sure to heat evenly by sweeping back and forth versus heating the same spot as you want to heat enough to stick the wax onto the tissue paper not melt the candle underneath. You'll know it's attached to the candle,  as your image will come thru the wax paper clearer. ;o)
  4. That's it, you decorate and embellish as desired.
Be sure to check out  the other DT's FABULOUS creations using this week's New Releases:
Paola 

Martha 


Our GDT this month:
Ema  

Don't forget we have a fun PROGRESSIVE CHALLENGE going on right now!  You can purchase I LOVE YOU THIS MUCH for 50% for the first 2 weeks of the challenge. You must use this image only to enter this month's challenge. If you create something (not just a colored image) with this month's image  then you will receive next month's image FREE! You have until Midnight (EST) on April 30th. :o)

Wait, there's more...there's a Monthly Cupcake freebie- here - Get it before it's gone! 


Check out the tasty make Karen made with it here and leave her some luv!

Happy Craftin'!
~hugs~
Amy